New XMPro Agent Integration: OPC UA Action Agent
Here at XMPro, we are constantly adding to our growing library of integrations for enterprise applications, data platforms, machine learning tools, and operational systems. These pre-built integrations allow our customers to build composable digital twins that are not only scalable but highly customizable for their specific use cases.
We are excited to announce that OPC UA is the latest agent to join our catalog. OPC UA integration now also features an Action Agent
OPC UA is a platform-independent standard through which various systems and devices communicate by sending request and response Messages between Clients and Servers or network messages between Publishers and Subscribers over supported network types such as HTTPS and HTTP.
In the OPC UA Client-Server model, a set of Services acts as the interface between Clients and Servers. Object information from the Server that is made available to the Client is called the Address Space and is exposed in formats such as XML and JSON.
The basic component of the Address Space is a Node, which contains values or references to other nodes. The referenced nodes represent the hierarchy structure.
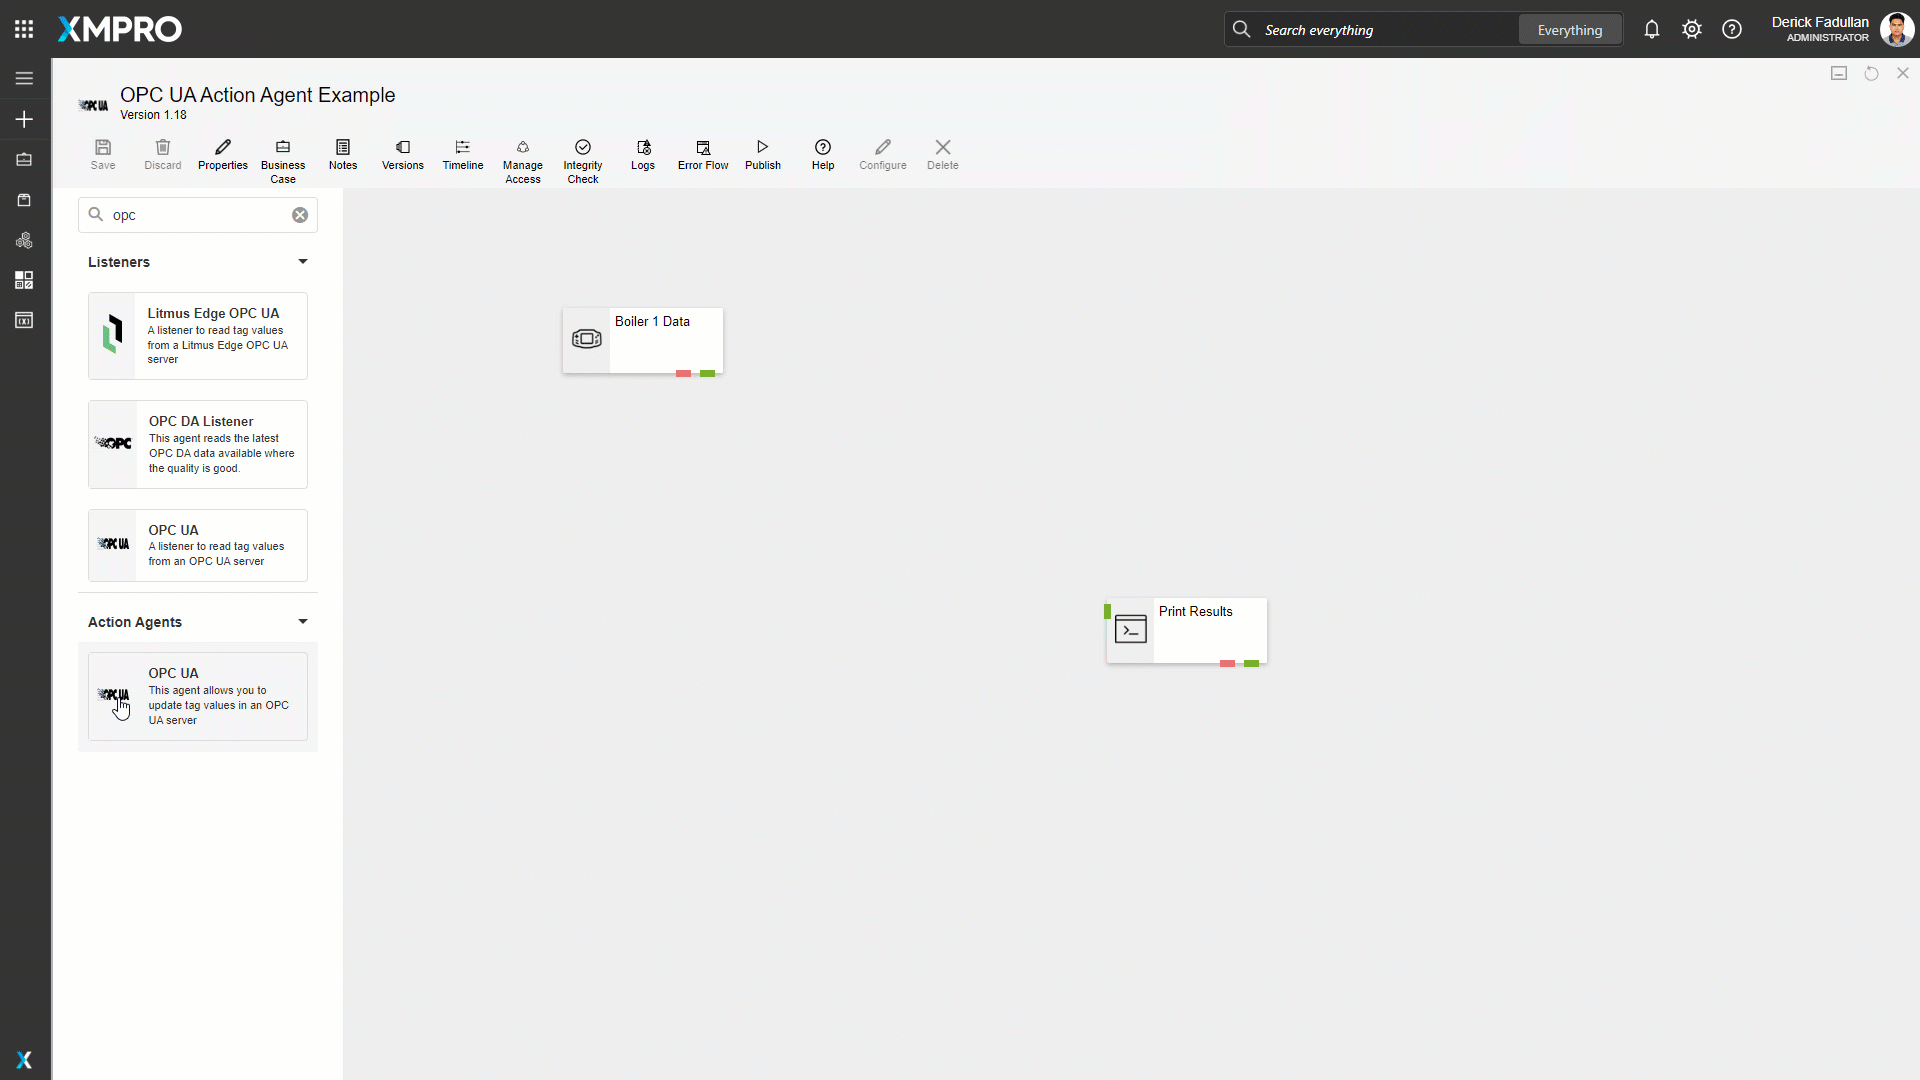
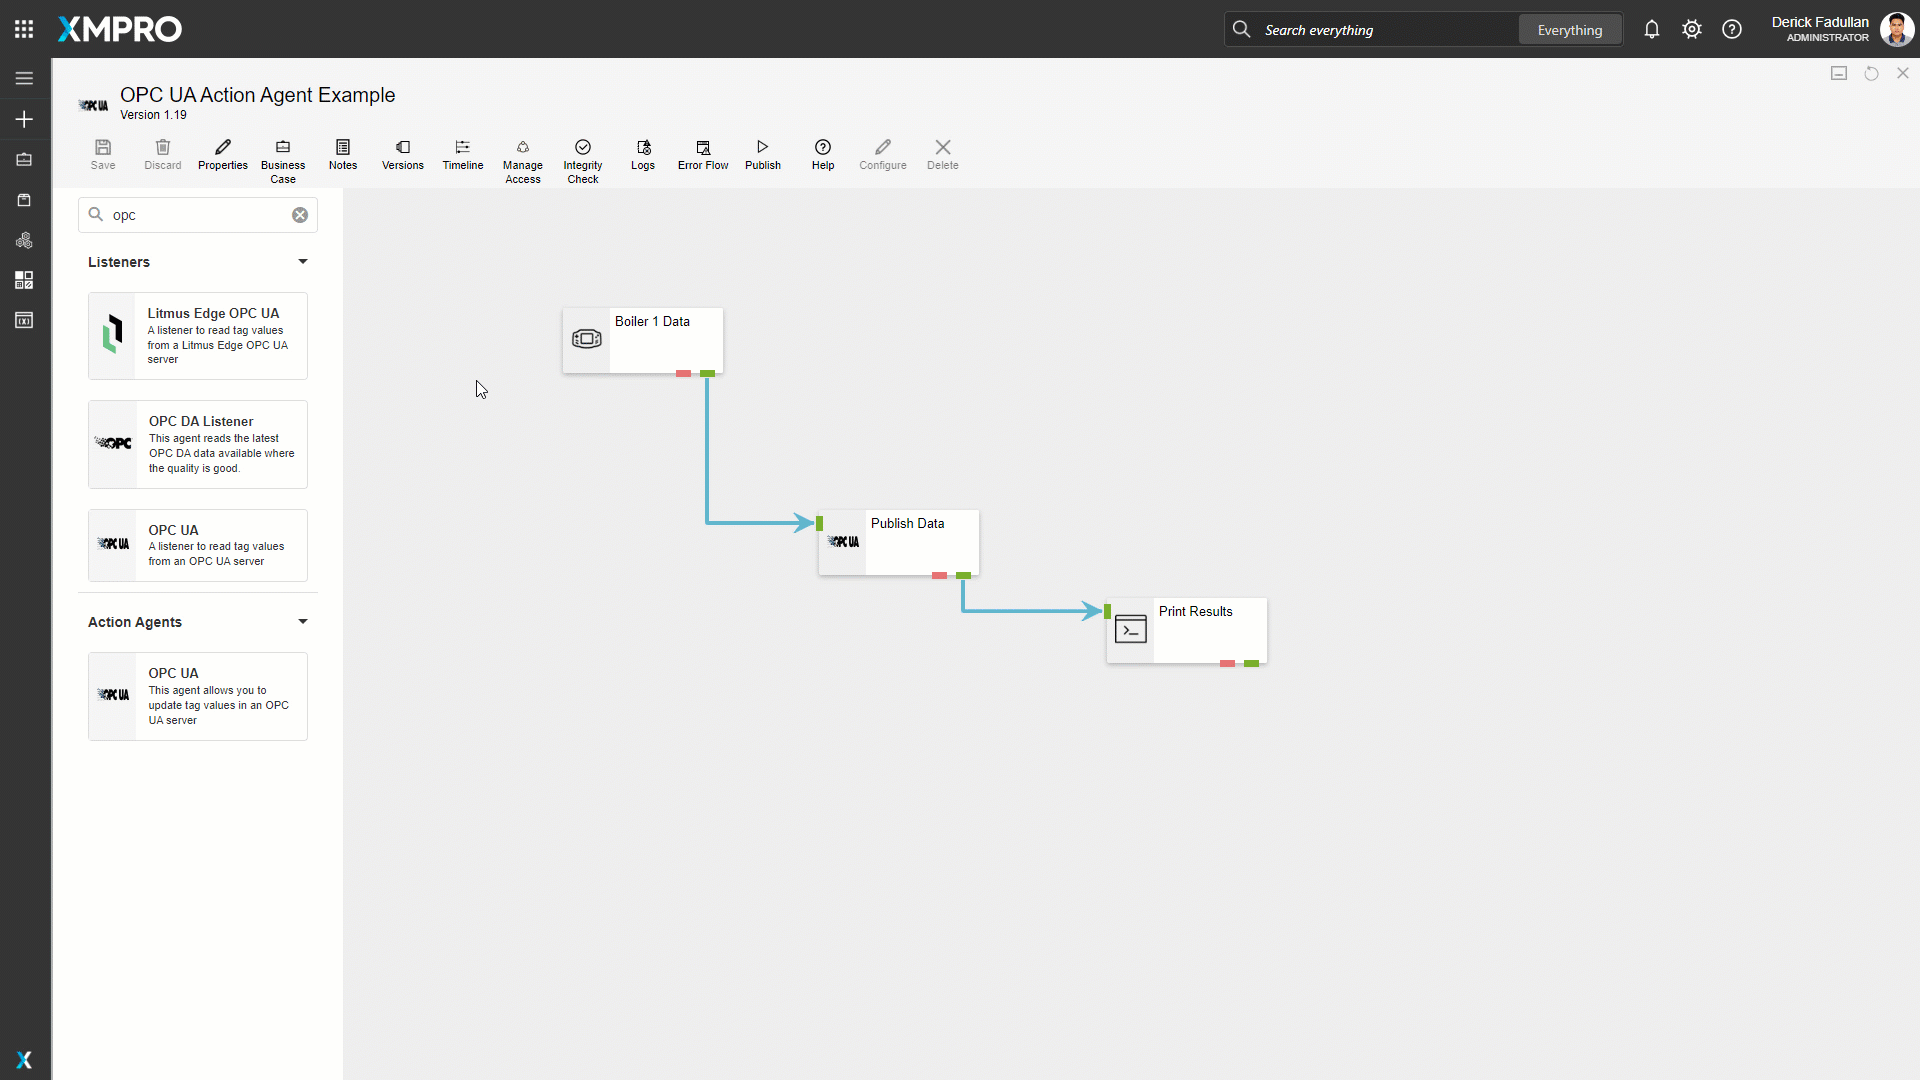
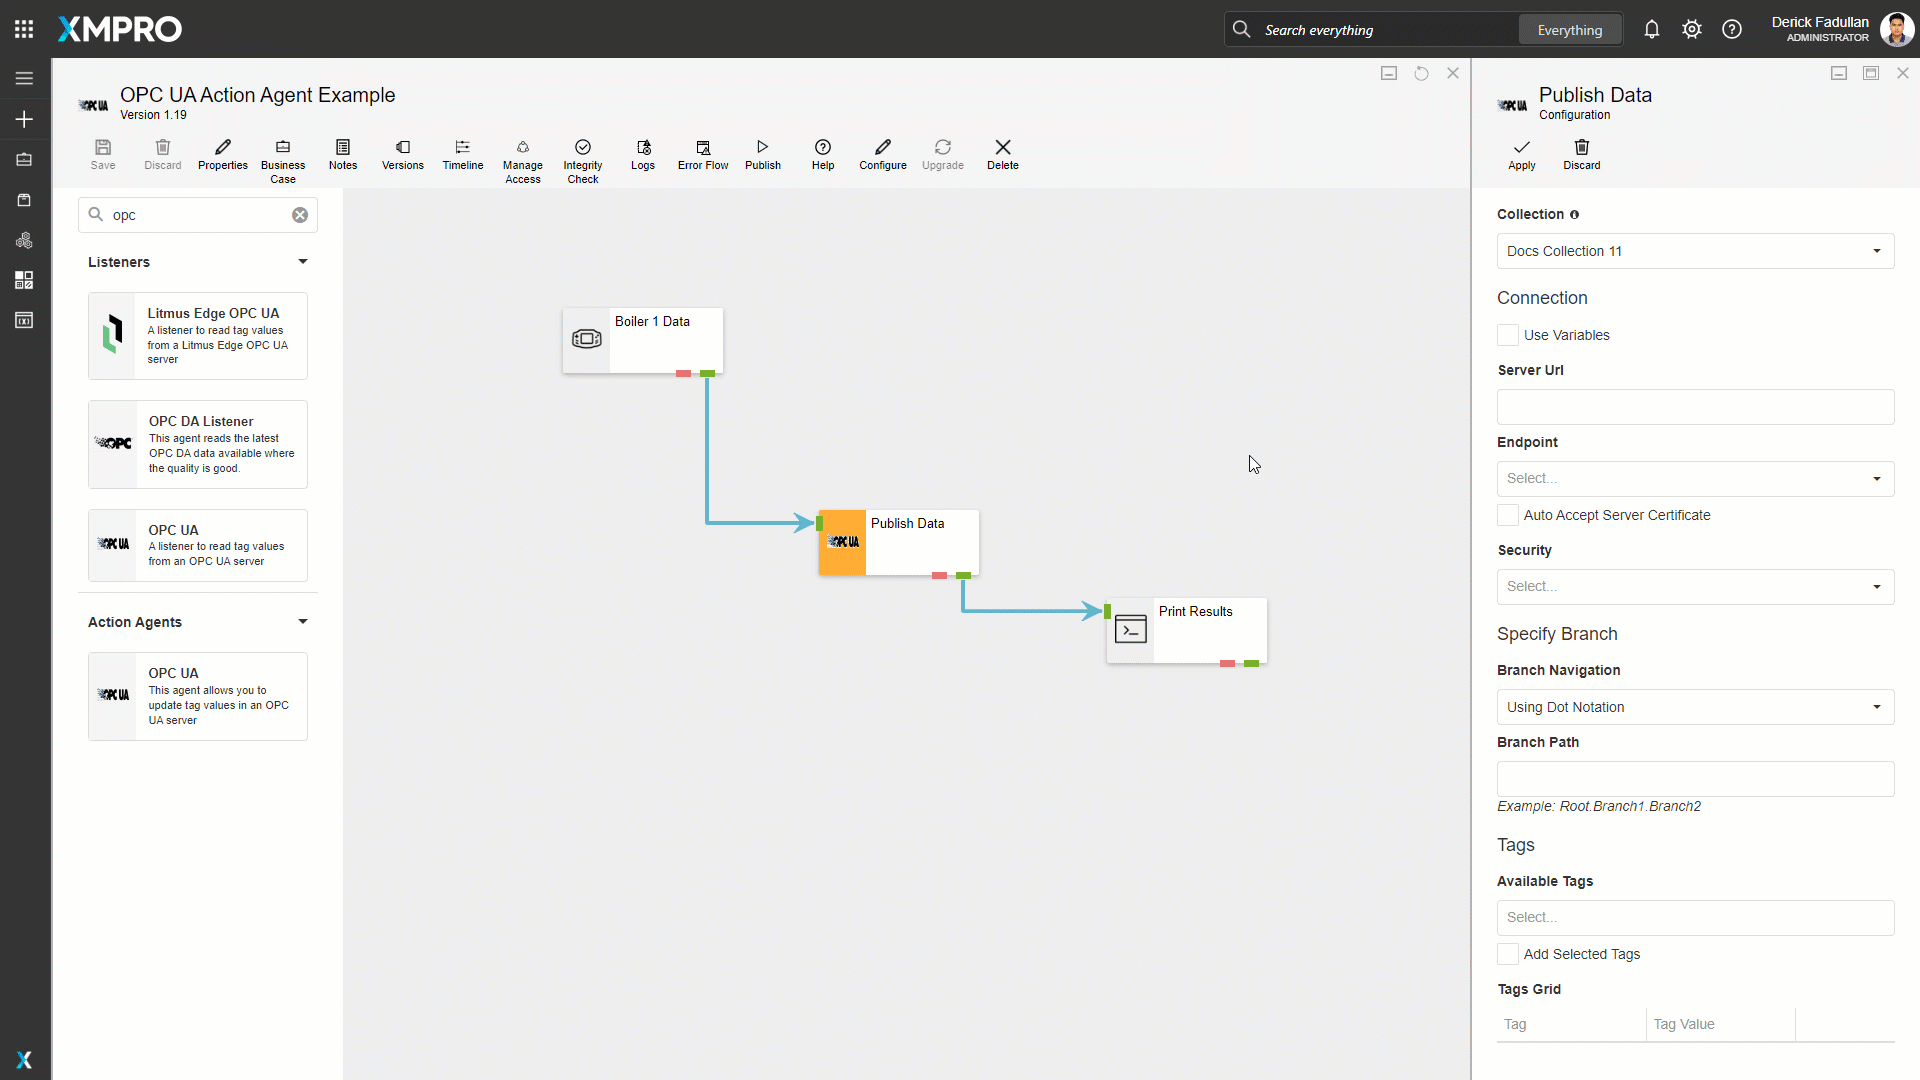
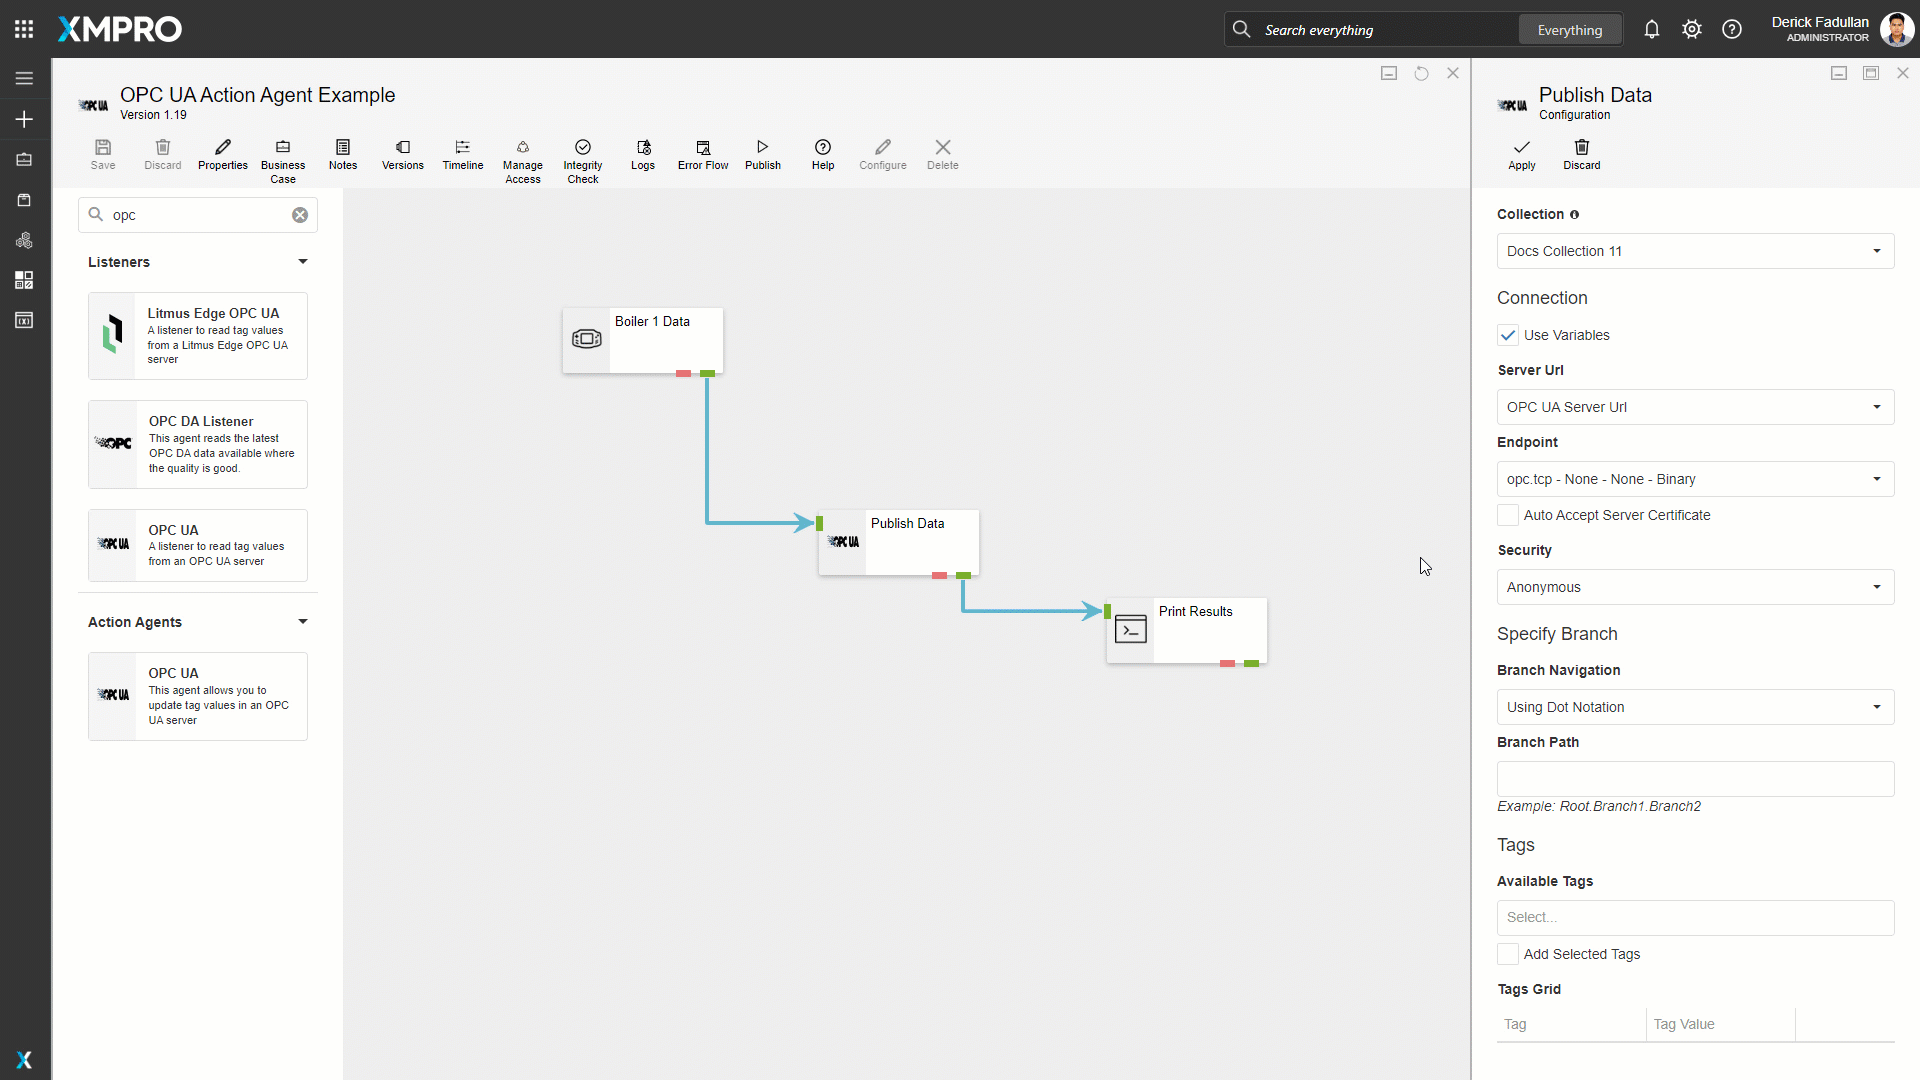
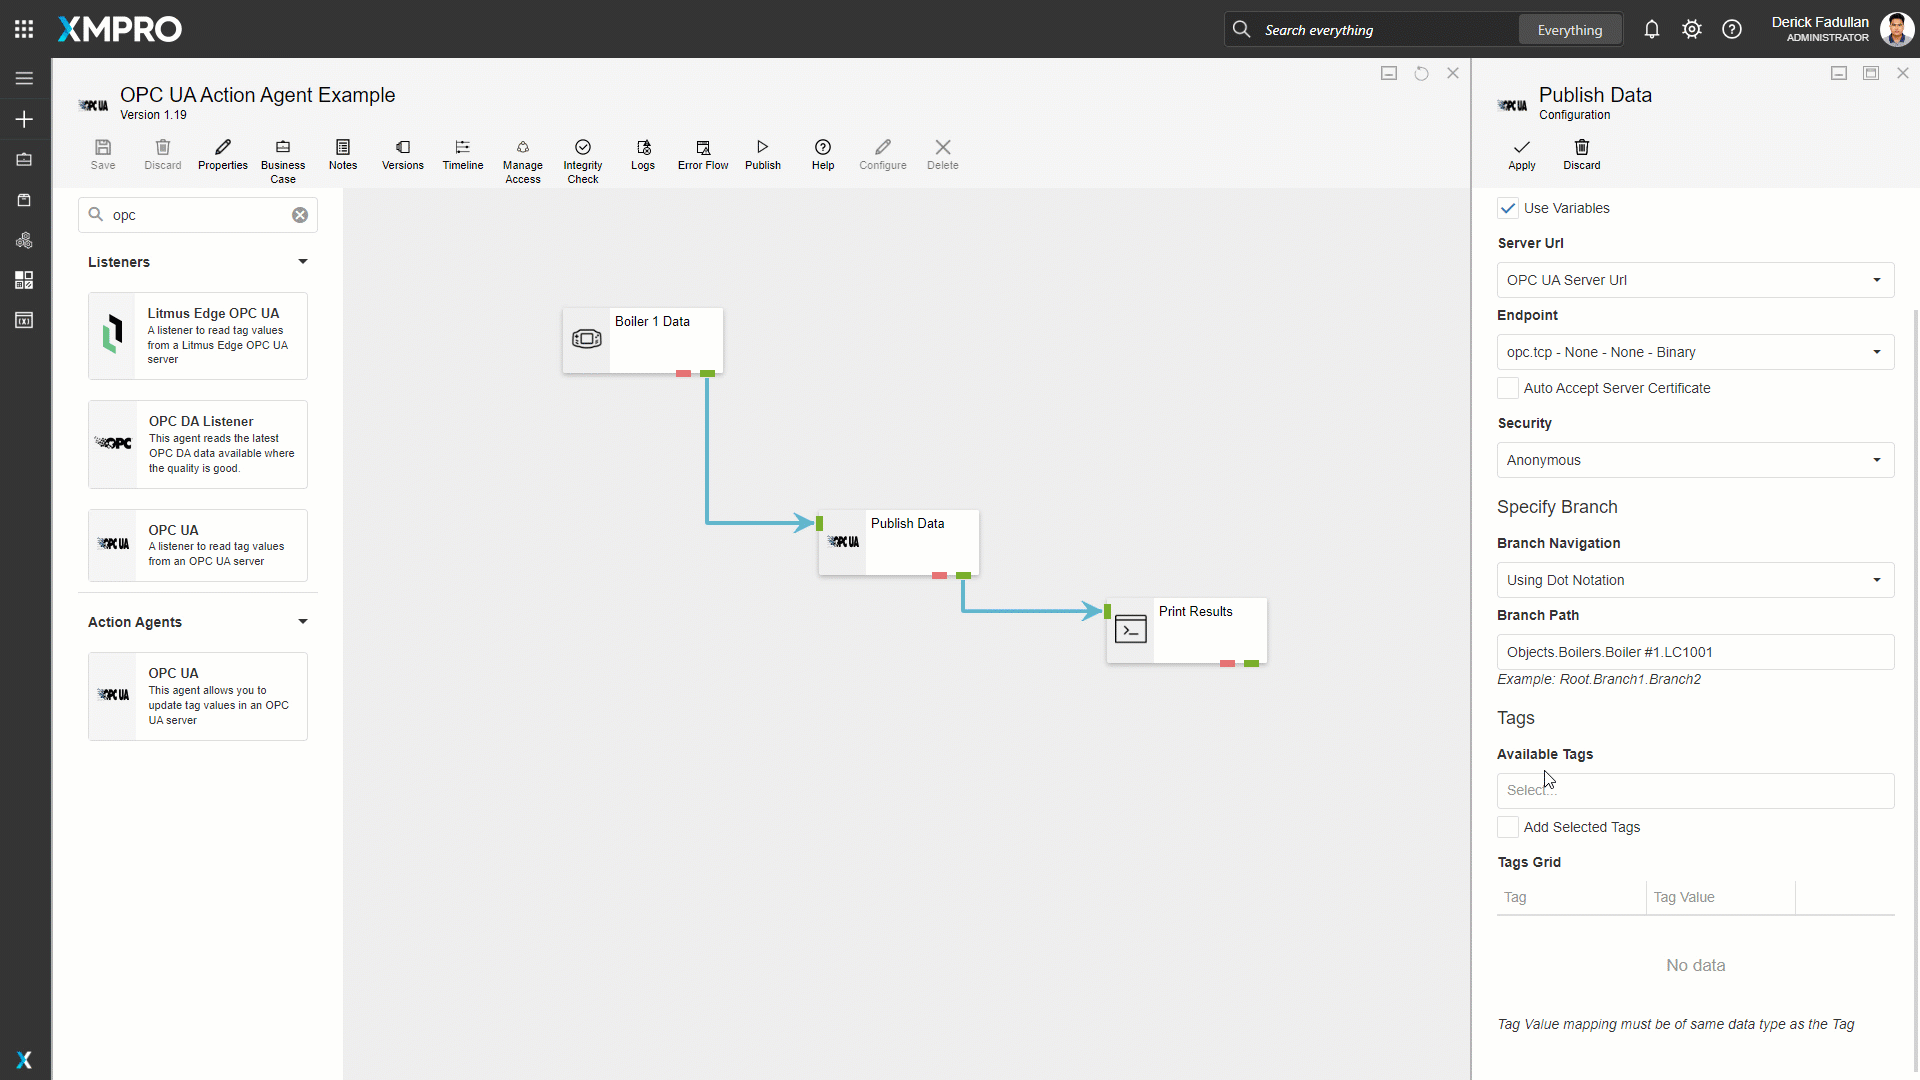
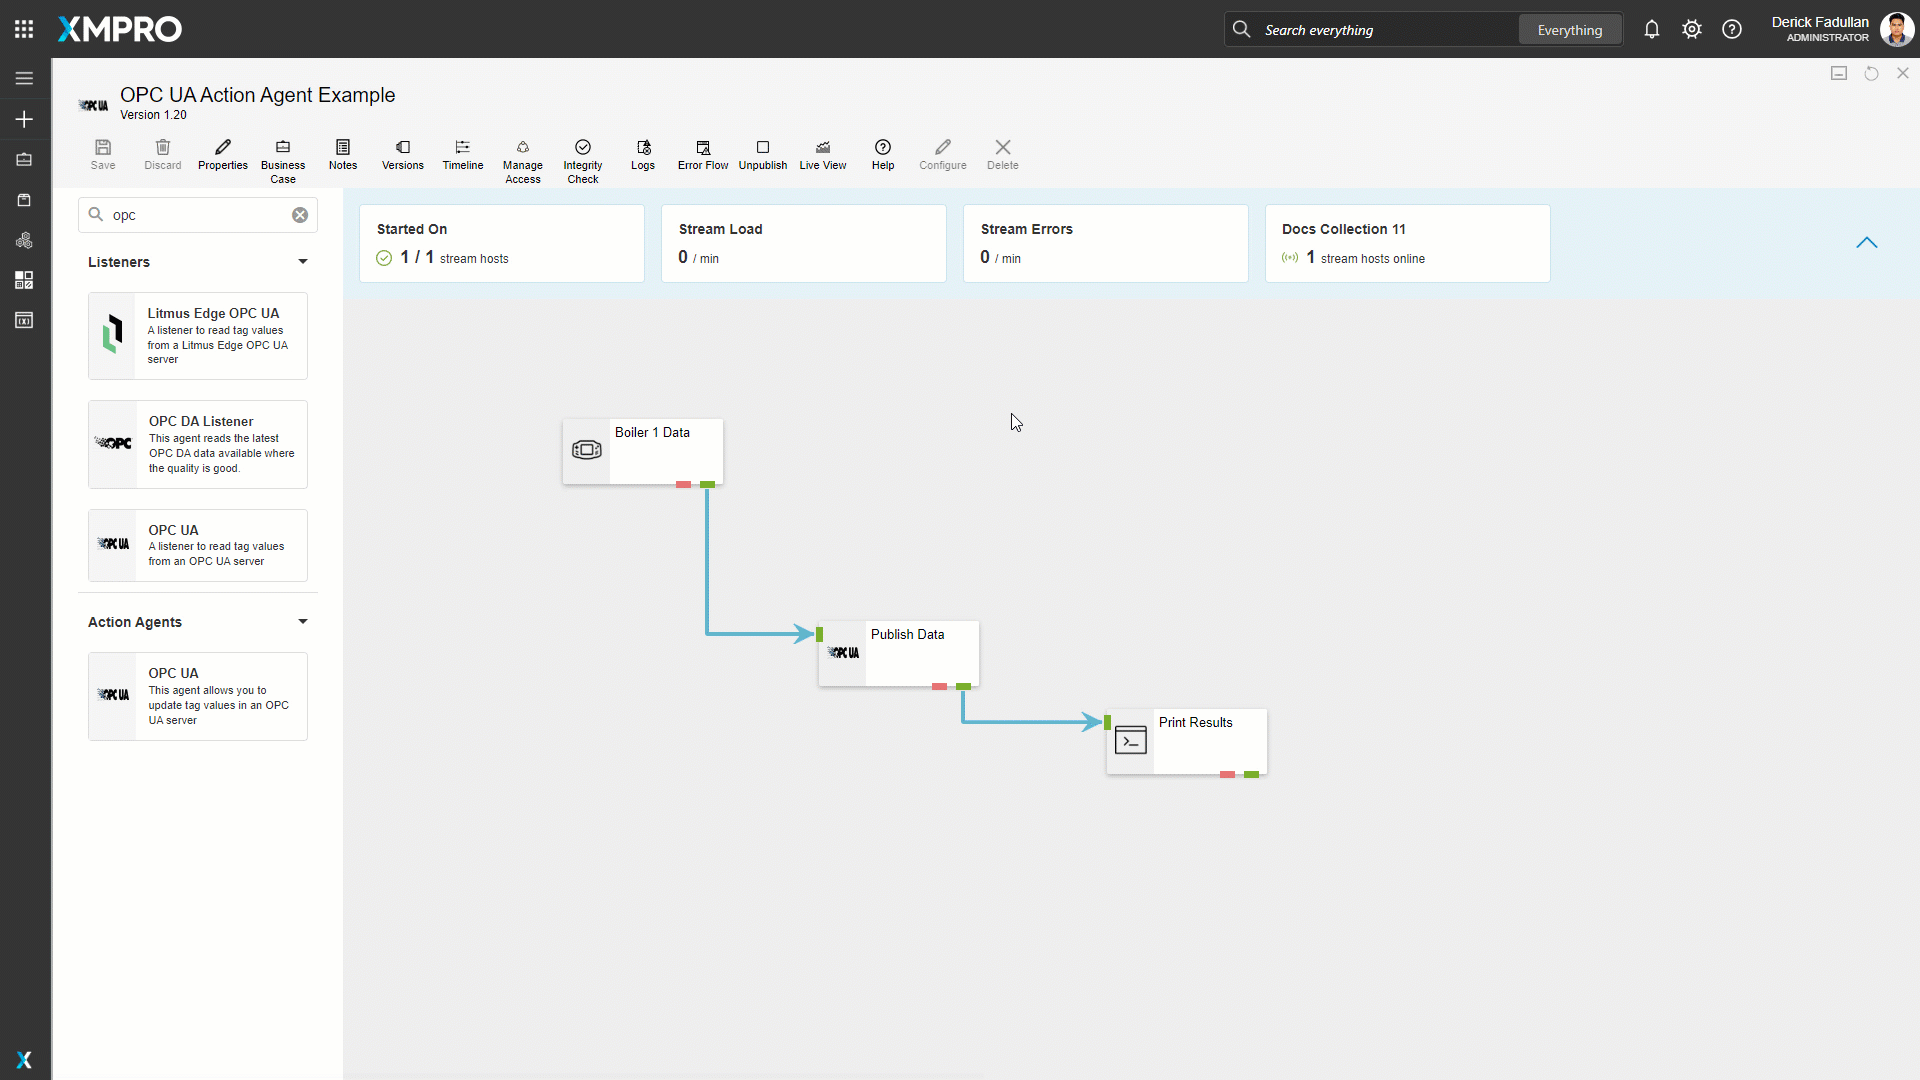
The OPC UA Agents allow you to traverse the Server Address Space represented by Branches and to include nodes as tags in your Data Stream, using the OPC UA Client-Server model to connect to an OPC UA Server endpoint.
For more information regarding the OPC UA standards, please see the Unified Architecture specification.
The Listener allows you to retrieve tag values of the selected nodes on the OPC UA Server.
The Action Agent allows you to publish the supplied tag values and its timestamp to the selected nodes on the OPC UA Server.
EXAMPLE